


How to Translate WpEstate with WPML
Learn how to translate WpEstate into more languages and create a multilingual website with WPML.


Translate all Elements
Translate all WpEstate elements, including pages, properties, agents, and more
Translate Theme Texts
Translate headers, footers, and any other texts in the theme
Localized Designs
Use the same design across languages, or create different designs in each language
Translate Any WpEstate Element
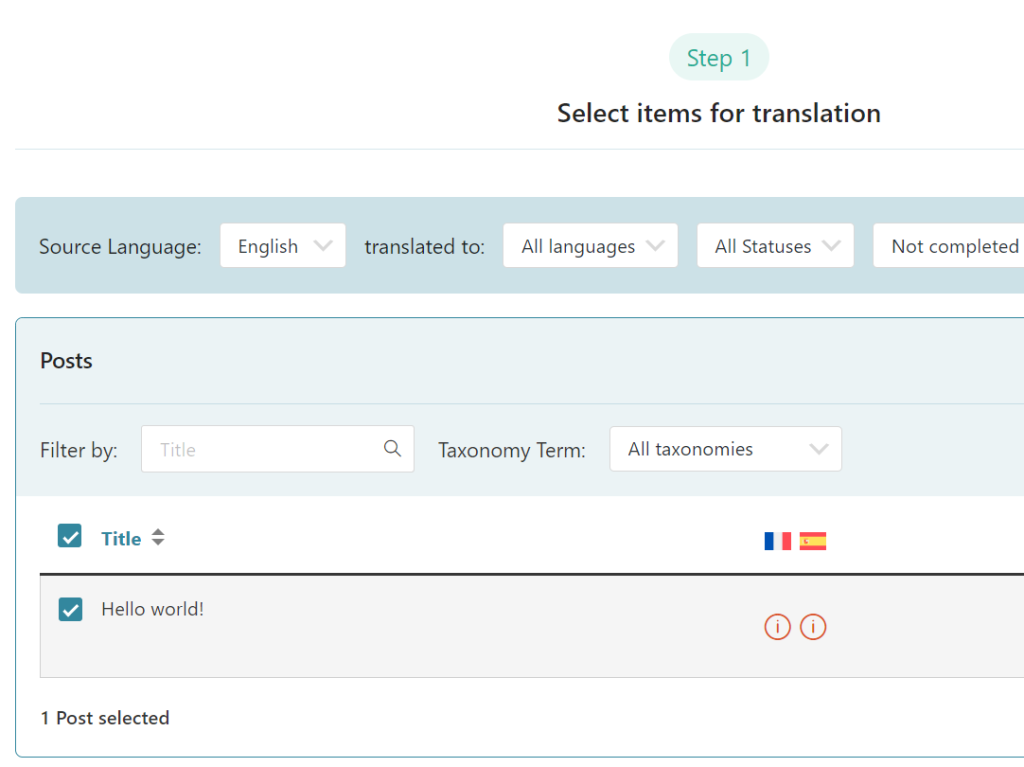
Translate any WpEstate element with WPML’s Translation Dashboard.
Simply go to WPML → Translation Dashboard and select content for translation. Then, choose to translate by yourself or using Private Translation Cloud (PTC), our most advanced automatic translation engine.
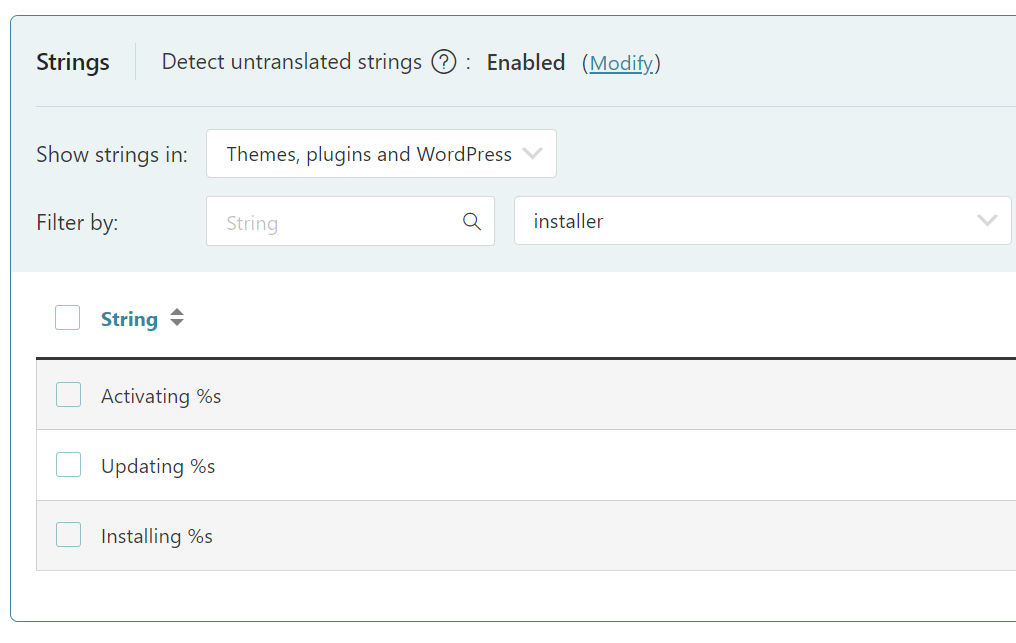
Translate Theme Texts
Translate your header, footer, and any other theme part via the Other texts (Strings) section in the Translation Dashboard, or with WPML’s String Translation.
Create Different Designs in Each Language
Offer visitors a unique experience by creating culturally relevant designs in each language.


Frequently Asked Questions
How can I assign translated properties to agents?
To assign a translated property to an agent:
1. Go to the Properties list in your WordPress admin.
2. Using the language switcher in the top admin bar, switch to your secondary language.
3. Edit your translated property and in the popup that appears, click Edit anyway.
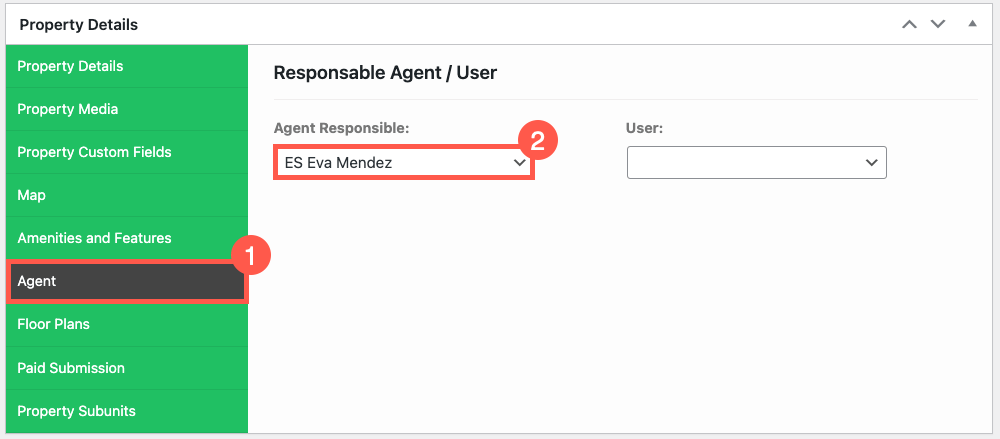
4. Scroll down to the Property Details sidebar and click the Agent tab.
5. Under the Agent Responsible drop-down, choose your translated agent.
Written by Amir · Last updated October 16, 2024